Previous Page

nihilist@mainpc - 2024-01-29

Linux Hypervisor Setup (QEMU/KVM virtualisation)

In this tutorial we're going to cover how to setup the open source hypervisor QEMU/KVM in Linux host OS, using the libvirt technology.

OPSEC Recommendations:

  1. Hardware : PC / Laptop / Homeserver / Remote Server

  2. Host OS : Linux

I recommend using this setup first of all to isolate your Public use, and to segment it from the other Uses such as Private use, but it can later be used for Anonymous use, and also Sensitive Use, as per the 4 basic OPSEC levels.

Why should Bob use an open-source hypervisor ?

Bob has a problem, he wants to use his laptop for 4 different internet uses:

But currently, he has only one laptop with linux as the host OS.

So the idea basically is that Bob does not need to purchase 4 laptops each for a different usage, he just needs to virtualise those machines using a Hypervisor:

Bob is going to use a QEMU/KVM hypervisor to virtualize 4 VMs, each for a specific use. The windows VM will be for public use, the debian VM will be for the private use, the Whonix VM will be for Anonymous use, and the other whonix VMs in the veracrypt hidden volume be used for sensitive uses.

Virtualisation setup


Next we do not virtualize anything using closed-source software like VMWare Workstation or else. We use QEMU/KVM with virt-manager, which is an open source hypervisor:


nihilist@debian:~# sudo apt install libvirt0 virt-manager dnsmasq bridge-utils

sudo systemctl enable --now libvirtd

nihilist@debian:~# sudo usermod -a -G libvirt nihilist
nihilist@debian:~# sudo usermod -a -G kvm nihilist

nihilist@debian:~# sudo vim /etc/libvirt/libvirtd.conf 
nihilist@debian:~# cat /etc/libvirt/libvirtd.conf  | grep sock_group
unix_sock_group = "libvirt"
unix_sock_rw_perms = "0770"

nihilist@debian:~#  cat /etc/libvirt/qemu.conf
group = "libvirt"
user = "nihilist"

nihilist@debian:~# systemctl restart libvirtd.service

nihilist@debian:~# virt-manager
	

Next just make sure that the NAT network is created, and that the ISOs and VMs folders are with the correct permissions:

And also create another NAT network so that we can put all the untrusted VMs such as Windows into:

That way, the adversary that can normally see what's going on in the network attached to the Windows VM can no longer see as it is being put in a different network altogether.


nihilist@debian:~$ mkdir ISOs
nihilist@debian:~$ mkdir VMs

nihilist@debian:~$ sudo chmod 770 -R VMs  
nihilist@debian:~$ sudo chmod 770 -R ISOs  
	
nihilist@debian:~$ sudo chown nihilist:libvirt -R VMs
nihilist@debian:~$ sudo chown nihilist:libvirt -R ISOs

Then you can add the file directories in virt-manager like so:

And now you're all set to start making VMs while maintaining the open-source requirement. If you still want to use a closed-source OS, you can do so in a QEMU VM from virt-manager. always remember that closed-source OSes like Windows belong in a VM, never out of one.

Additional notes: you can prevent an adversary to tamper with your laptop, by using glitter polish as shown in mullvad's tutorial, and also make sure that your phone does not have a closed-source host OS by using Graphene OS.

How to setup Vms for Public and Private use


Next, Bob needs to use VMs for 2 basic needs: Public internet usage, and Private internet usage. He first needs to download the Windows ISO file, and the debian iso file too:

First he creates the windows VM like so:

Then before we begin the installation, we make sure that the windows VM uses the untrusted NAT network to make sure it remains isolated:

Then we hit Apply, and then we click on begin installation

Then he creates the debian VM like so:

Then in both VMs he installs the OS on the virtual disk:

Then Bob can launch both VMs (make sure that the VM boots onto the disk instead of the iso in the boot settings):

Then Bob can use the windows VM for his public usage (such as KYC services, and closed-source software), and use the debian VM for his private usage (any personal matter, with only open source software)

From inside the Debian VM, you can run the following from a terminal to be able to copy and paste from inside the VM out, and from outside the VM in:


su -
apt update -y
apt install spice-vdagent -y
reboot now

Do not do the same for the windows VM, otherwise you'd be allowing the Windows VM to spy on what your clipboard contains, from outside the VM. Make sure it is kept isolated as it is by default here.

Next, Bob can setup a VPN by default into his debian VM to prevent his ISP from spying on what he is doing.

How to harden your private VM by distro-morphing it into Kicksecure


What is Kicksecure? Kicksecure is a free and open-source Linux distribution designed to provide a highly secure computing environment. It is built on a hardened version of Debian, implementing a defense-in-depth security model that protects against various types of malware and attacks.

Reasons to use Kicksecure

  • Enhanced Security Features:
  • Kicksecure is designed with a strong focus on security, incorporating various hardening techniques such as kernel hardening, user account isolation, and application-specific restrictions.

  • Privacy Protection:
  • All updates and software installations are routed through the Tor network, ensuring that user identities and IP addresses remain anonymous.

  • Lower Attack Surface:
  • Kicksecure minimizes potential vulnerabilities by not having open server ports or unnecessary services running by default.

  • User -Friendly Experience:
  • The operating system is designed to be accessible, with many applications available in their apt repositories and configured for immediate use, such as the tor browser.

  • Compatibility with Virtualization:
  • Kicksecure supports various virtualization options, allowing users to run it in a virtual machine.

  • Free and Open Source:
  • As an open-source project, Kicksecure allows users to review, modify, and redistribute the source code.

Kicksecure is important in many scenarios. It is ideal for individuals handling sensitive data, such as personal or financial information, as its robust security features protect against data breaches and unauthorized access. Journalists, activists, and whistleblowers can maintain anonymity while communicating, safeguarding their identities from surveillance. Users accessing public Wi-Fi can rely on Kicksecure for secure browsing, reducing the risk of data interception. Running Kicksecure in a virtual machine helps contain potential malware threats, protecting the primary operating system. Additionally, developers and researchers can create a secure environment for security tools and cybersecurity research. Kicksecure also serves as an educational resource, offering documentation and community support for users looking to enhance their security knowledge. Its hardened configuration defends against brute force attacks, making it suitable for securing sensitive accounts. Overall, Kicksecure is essential for anyone prioritizing security, privacy, and anonymity in their digital activities. For more details on why you should use kicksecure, check out their official website.

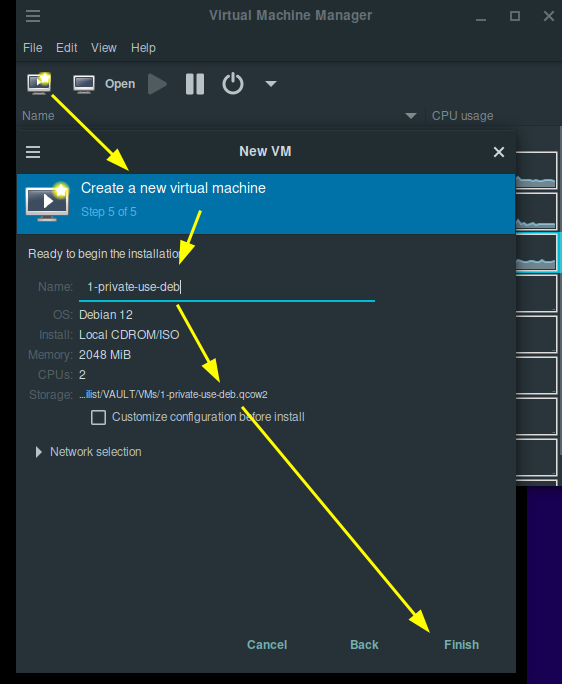
Now let's setup Kicksecure in the private VM, by distro-morphing the Debian guest OS into a Kicksecure guest OS. First,we need to create a new group called console. Then add the your user to the console group

sudo addgroup --system console
sudo adduser "your_username" console

After that,we need to install console related packages.

 sudo apt install console-data console-common kbd keyboard-configuration

Now, we will install extrepo to get the kicksecure APT repository. We will also enable the repository

  sudo apt install extrepo 
  sudo extrepo enable kicksecure 

Next step is to download the kicksecure packages. Note that this will install a desktop environment(Xfce) and other applications

sudo apt install kicksecure-xfce-host

Finally, we need to enable the Kicksecure APT derivative.list in /etc/apt/sources.list.d/derivative.list

sudo repository-dist --enable --repository onion

This command will generate derivative.list file.

Disable the extrepo kicksecure APT repository. This is to avoid a duplicate Kicksecure repository.

 sudo extrepo disable kicksecure

That's it! A quick reboot will apply all the new settings and configurations.

sudo reboot

Changes after reboot

New GNU GRUB menu

sdwdate to synchronize the system clock with time servers over the Tor network for better anonymity.

System Integrity Checks

System updates over Tor

In conclusion,Kicksecure offers a robust solution for security and privacy, built on a hardened Debian foundation. Users can confidently operate within a Kicksecure VM, ready for private use in today’s complex digital landscape.

Nihilism

Until there is Nothing left.


Creative Commons Zero: No Rights Reserved

About nihilist

Donate XMR: 85fGTpPWivci2dRzJSgvm5QeEuEUZ11ZDbZA6Yc58XdCHSen2oRKLpgbNBr1sv9gacbrfMP3Qw23RcGqYb8V1FN4L67kph6


Contact: nihilist@contact.nowhere.moe (PGP)