3.5 KiB
| search | ||
|---|---|---|
|
0
Before we start, you will need a Debian 10+ VPS (you can get one on digitalocean for example), if you prefer to use your own self hosted server, make sure that port 80 and 443 are correctly port forwarded so that the public ip points to the server and not the router. Once that's done, go and ssh into your debian 10 server.
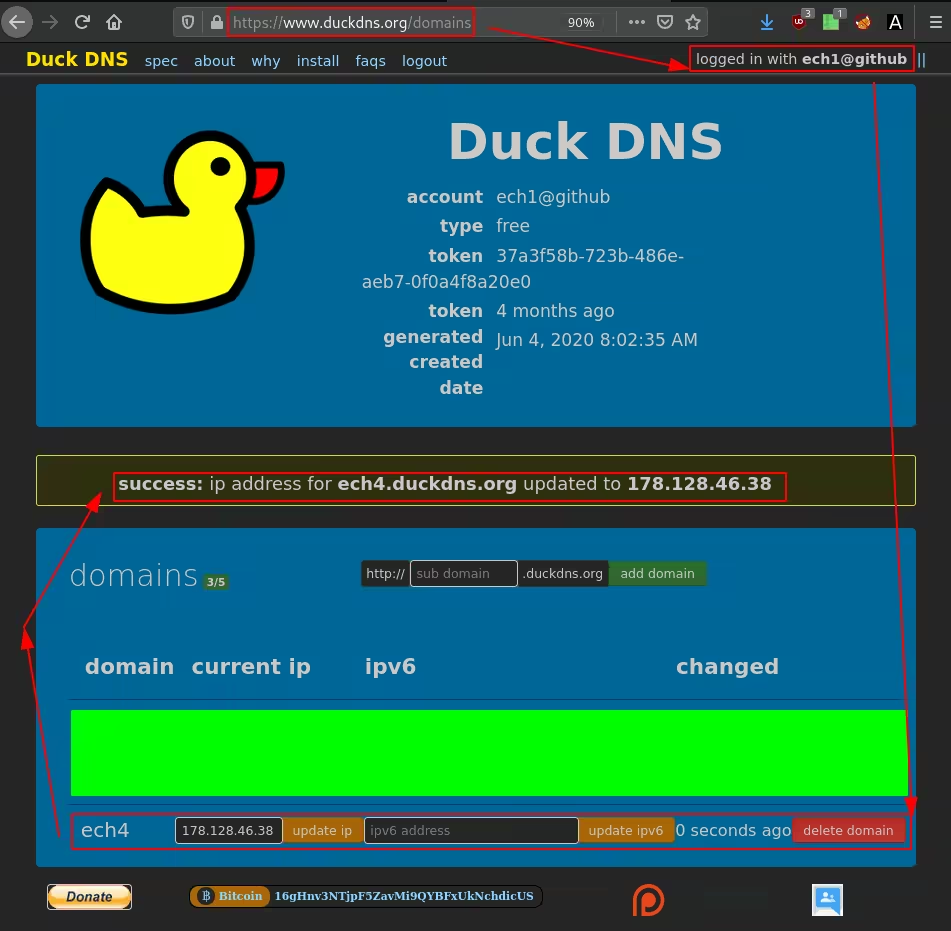
You can use DuckDNS to get a free domain name:
[ 192.168.100.1/24 ] [ /dev/pts/13 ] [~/Nextcloud/blog/Conf]
→ ssh root@ech4.duckdns.org
The authenticity of host 'ech4.duckdns.org (178.128.46.38)' can't be established.
ECDSA key fingerprint is SHA256:z2HAncB99pfbAUfj9tJY7vlo8EGUzCIUxWBAnjAflcA.
Are you sure you want to continue connecting (yes/no/[fingerprint])? yes
Warning: Permanently added 'ech4.duckdns.org,178.128.46.38' (ECDSA) to the list of known hosts.
Linux debian-s-1vcpu-1gb-lon1-01 4.19.0-10-cloud-amd64 #1 SMP Debian 4.19.132-1 (2020-07-24) x86_64

The programs included with the Debian GNU/Linux system are free software;
the exact distribution terms for each program are described in the
individual files in /usr/share/doc/*/copyright.

Debian GNU/Linux comes with ABSOLUTELY NO WARRANTY, to the extent
permitted by applicable law.
root@debian-s-1vcpu-1gb-lon1-01:~#
Also make sure that you don't use digitalocean for this beacuse they seem to block kernel modules that is required for wireguard (modprobe wireguard(to check if the module got successfully installed))
Initial Setup
First verify if you are not running in a container
systemd-detect-virt
If it returns anything other than none/kvm/vmware then this tutorial does not cover it.
First get the required dependencies
echo 'deb http://deb.debian.org/debian buster-backports main' >> /etc/apt/sources.list.d/backport.list
apt update -y && apt upgrade -y

apt install wireguard
Then please reboot so that the kernel changes are applied.

reboot now


touch /etc/wireguard/wg1.conf
chmod 700 /etc/wireguard/wg1.conf

wg genkey >> /etc/wireguard/wg1.conf
nano /etc/wireguard/wg1.conf


[Interface]
Address = 10.66.66.1/24,fd42:42:42::1/64
ListenPort = 1194
PrivateKey = oAFh3bswQBHn9YOURSERVERPRIVATEKEYhWFiZWFQ=

[Peer]
PublicKey =
AllowedIPs = 10.66.66.2/32,fd42:42:42::2/128
CTRL+S to save, CTRL+X to exit nano,
Next allow routing on the server:
echo "net.ipv4.ip_forward = 1
net.ipv6.conf.all.forwarding = 1" > /etc/sysctl.d/wg.conf

sysctl --system
ip a | grep \< #pick the interface used to reach internet:

iptables -t nat -A POSTROUTING -o eth0 -j MASQUERADE
ip6tables -t nat -A POSTROUTING -o eth0 -j MASQUERADE

wg-quick up wg1
then install wireguard on your local machine:
echo 'deb http://deb.debian.org/debian buster-backports main' >> /etc/apt/sources.list.d/backport.list
apt update -y && apt upgrade -y

apt install wireguard

touch /etc/wireguard/wg1.conf
chmod 700 /etc/wireguard/wg1.conf

wg genkey >> /etc/wireguard/wg1.conf
nano /etc/wireguard/wg1.conf


[Interface]
Address=10.66.66.2/24,fd42:42:42::2/64
PrivateKey = AOo1UXbkSZmNPFncjgTRfaHl3Pa6F7dpYCVXOZ6YS3g=

[Peer]
Endpoint = ech1.duckdns.org:1194
AllowedIPs = 0.0.0.0/0,::/0
Publickey =
TLDR don't use digitalocean for wireguard